

Workspaces and Their Uses in Adobe Premiere Pro
Adobe Premiere Pro provides a flexible editing environment where workspaces play a major role in improving editing speed and productivity. A workspace is a predefined arrangement of panels designed for specific editing tasks. Instead of manually organizing panels every time, Premiere Pro allows editors to choose layouts based on their workflow requirements.
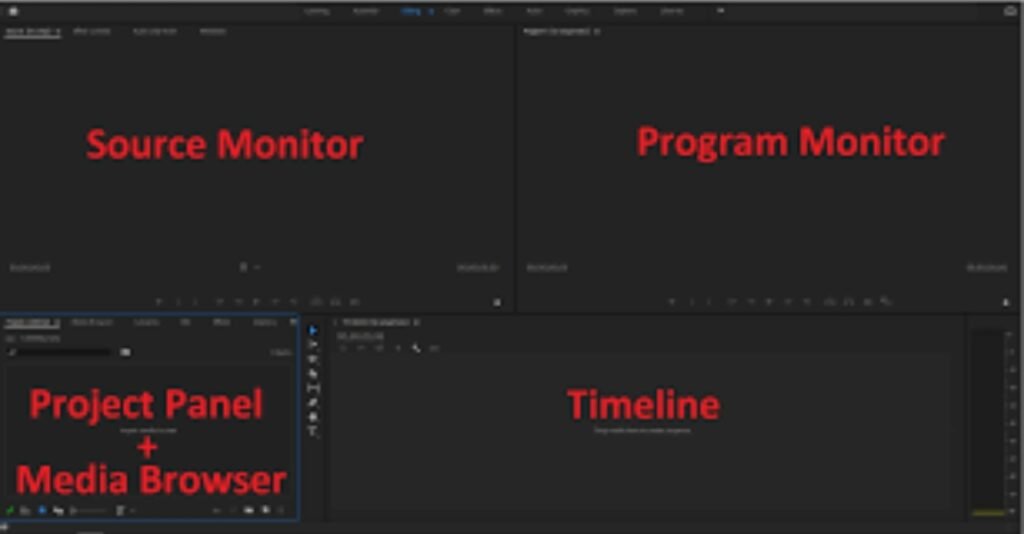
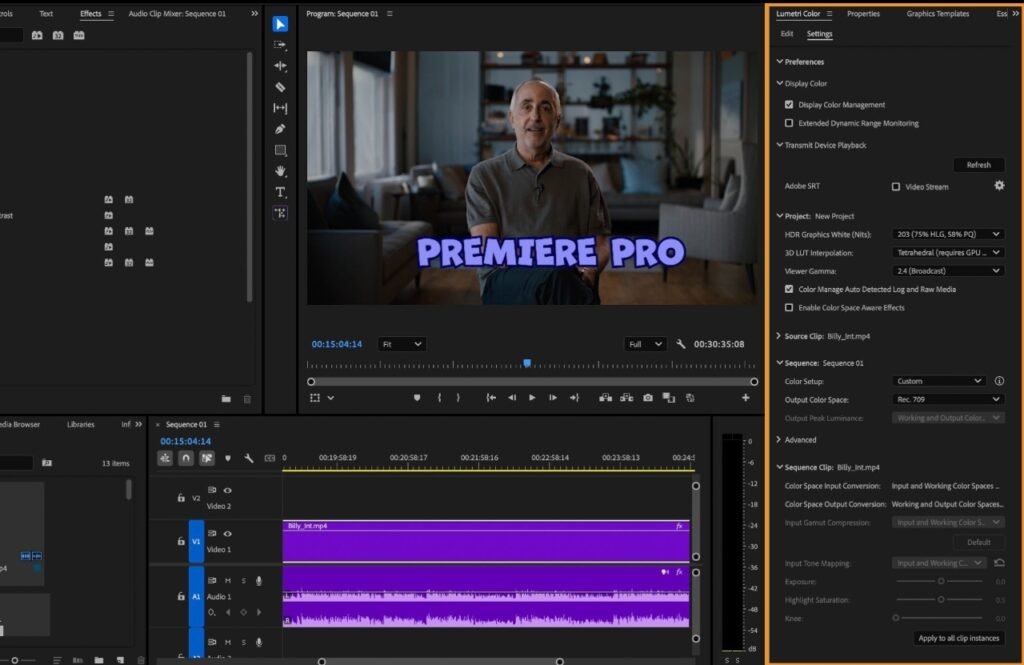
The Default Editing workspace is mainly used by beginners and professional editors for general video editing. It contains essential panels like Project Panel, Source Monitor, Program Monitor, Timeline, and Effects Panel, allowing editors to perform basic cutting, trimming, and arranging clips efficiently. The Color workspace is specially designed for color correction and color grading. It provides access to Lumetri Color tools where editors can adjust exposure, contrast, shadows, highlights, and color tones to enhance visual quality.
The Audio workspace helps editors manage sound effects, background music, voice recordings, and noise reduction using professional audio mixing tools. The Effects workspace focuses on applying transitions, visual effects, and motion adjustments. Premiere Pro also allows users to create and save custom workspaces according to their editing style. This flexibility helps editors reduce time consumption, maintain consistency, and improve workflow efficiency while handling complex projects.
Folder Structure and Importing Media Files
Maintaining a proper folder structure is one of the most important practices in professional video editing. Without proper organization, projects become difficult to manage, files may go missing, and editing speed decreases significantly. Premiere Pro uses “Bins,” which function like folders inside the Project Panel to organize different types of media files. A professional editor usually creates separate bins for video footage, audio files, images, graphics, sequences, and exports. This method allows easy access to files and reduces confusion during editing.
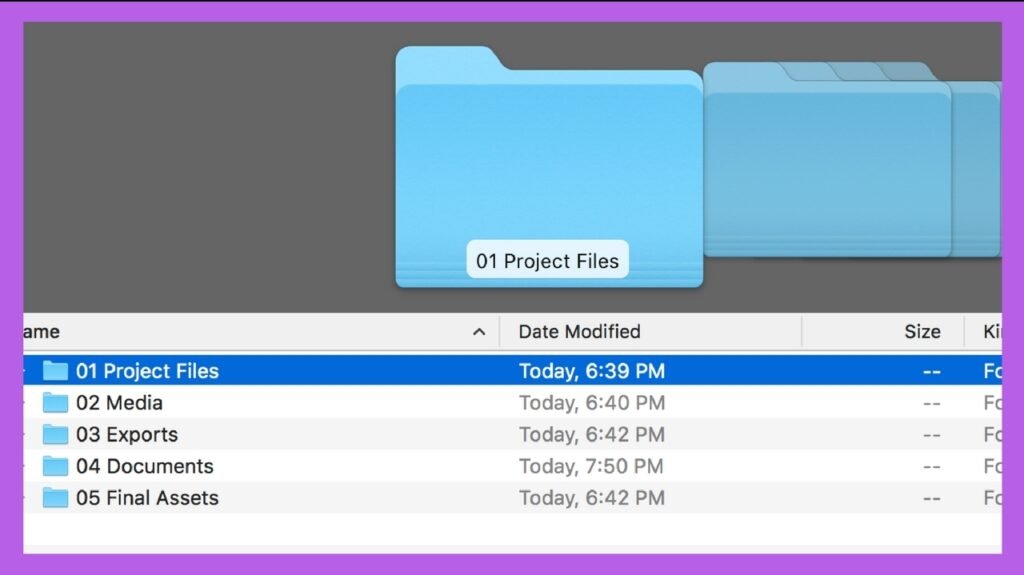
On the computer storage level, editors should also maintain a structured project folder system. A standard project structure includes folders such as Footage, Audio, Images, Graphics, Project Files, and Final Exports. This organized structure helps in quick backup, easy file transfer, and efficient collaboration with teams or clients.
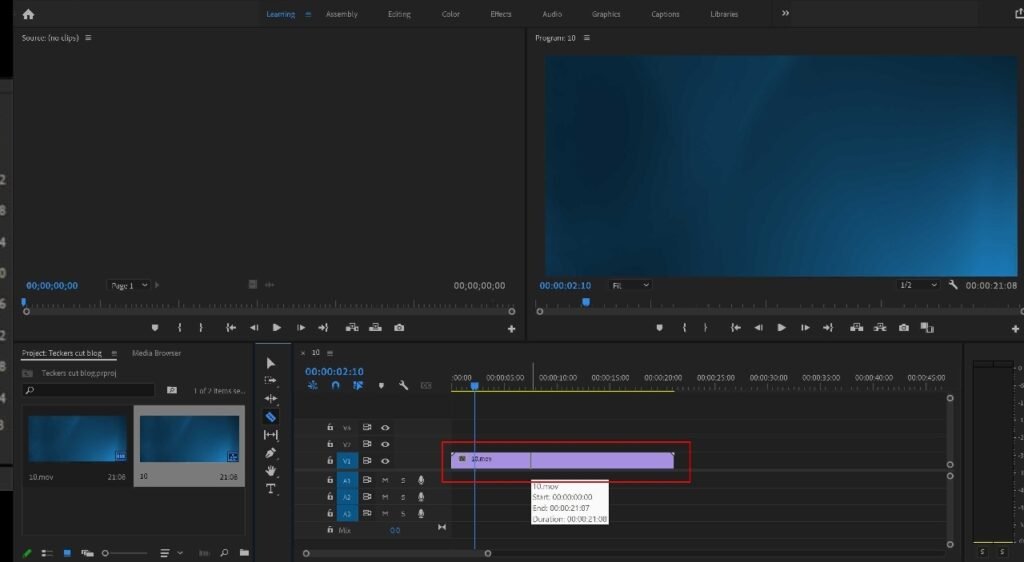
Importing files into Premiere Pro can be done using multiple methods. Editors can import media through the File menu, drag and drop files directly into the Project Panel, or use the Media Browser for advanced importing. The Media Browser is particularly useful when importing footage from cameras or external storage devices because it maintains original file structure and prevents errors. Proper importing ensures smooth playback, faster rendering, and better project stability throughout the editing process.
Sequence Settings, Ratios, and Video Resolutions
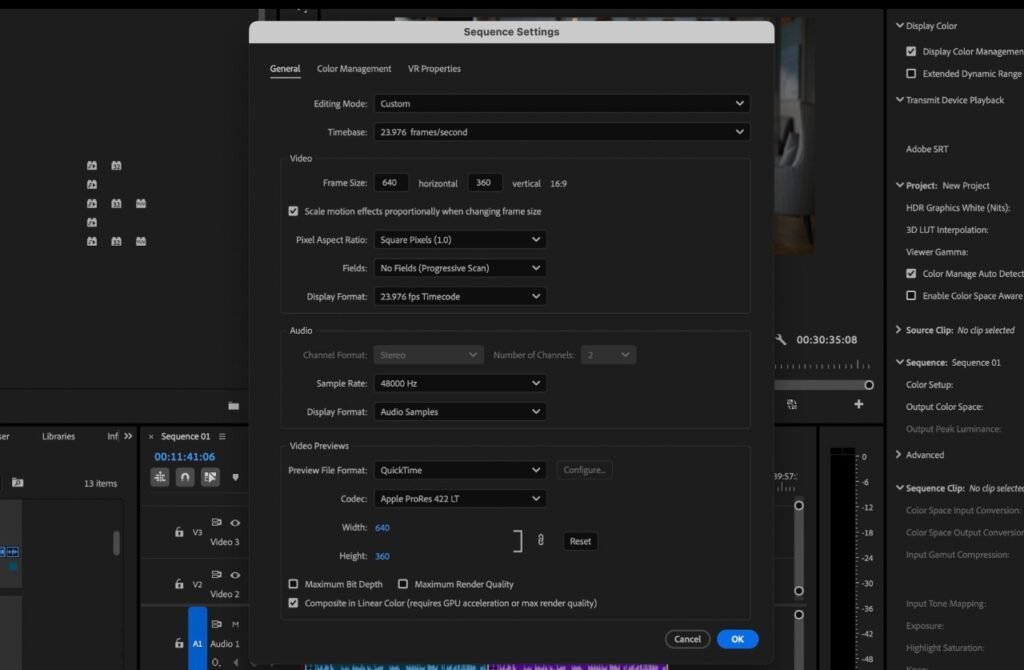
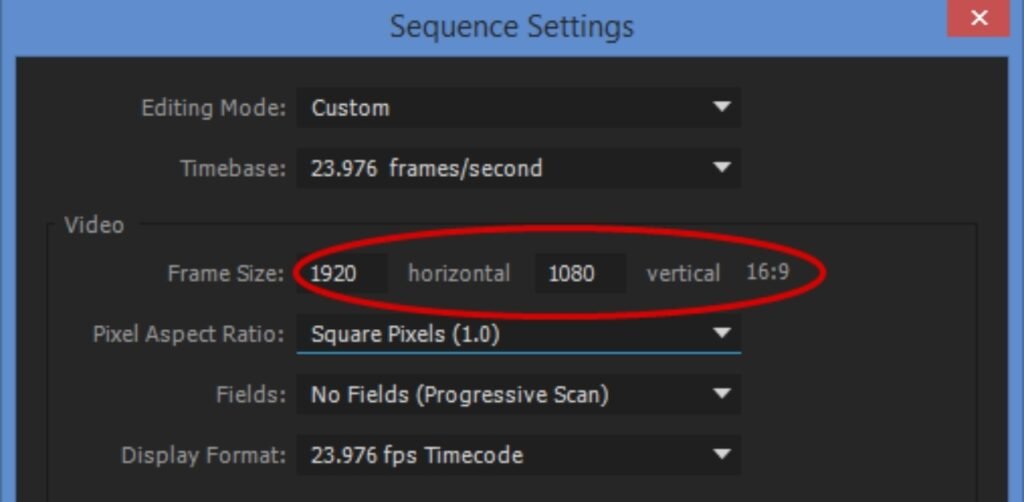
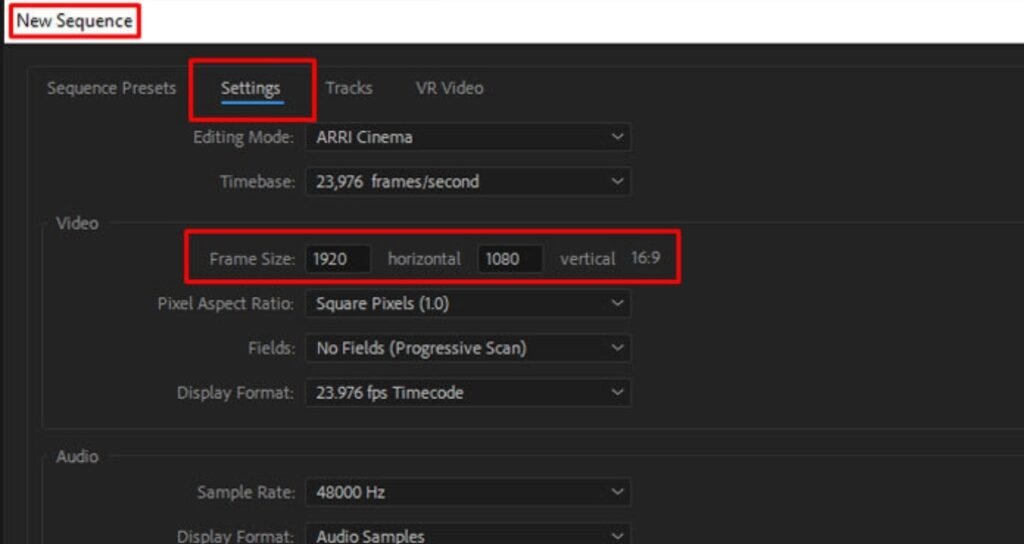
Sequence settings define the technical foundation of a video project in Premiere Pro. A sequence controls frame size, frame rate, aspect ratio, and playback resolution. Choosing correct sequence settings is essential because they determine the final output quality and platform compatibility.
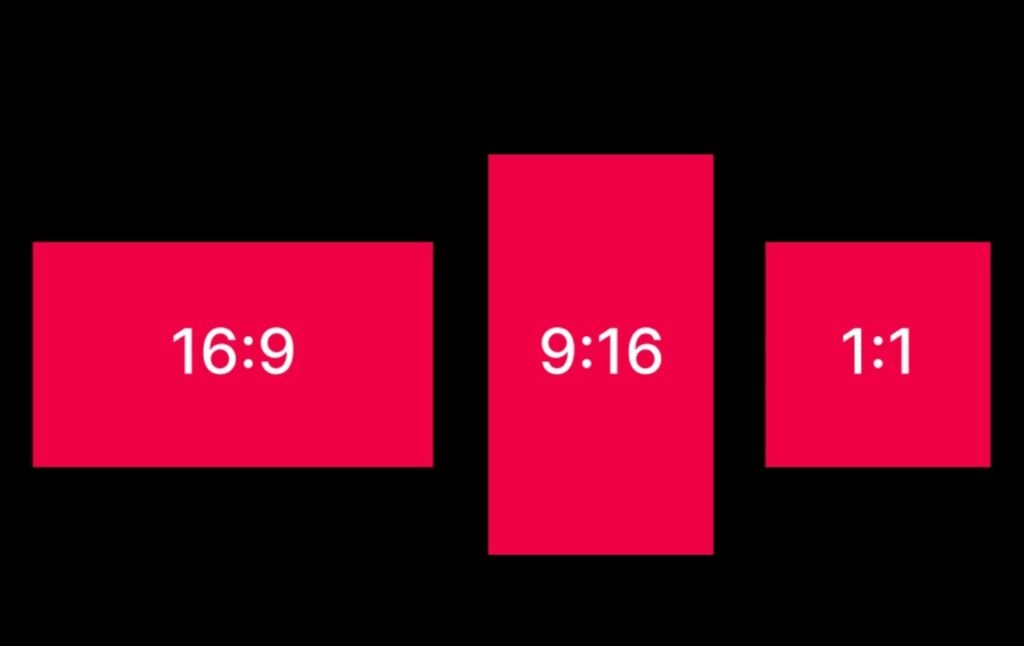
Aspect ratio refers to the relationship between the width and height of a video frame. The 16:9 aspect ratio is widely used for YouTube videos, television content, and online tutorials because it fits standard screens perfectly. The 9:16 ratio is designed for mobile viewing platforms such as Instagram Reels, YouTube Shorts, and TikTok videos. The 1:1 square ratio is commonly used for social media posts and advertisements, while the 4:5 ratio provides better screen coverage on mobile devices.
Video resolution determines the clarity and sharpness of a video. The most common resolution is 1920×1080, also known as Full HD, which provides high-quality output suitable for most platforms. Higher resolutions like 4K offer greater detail and professional-level quality but require more processing power. Frame rate is another important setting that controls motion smoothness. A frame rate of 24 frames per second provides a cinematic look, 30 frames per second is used for standard videos, and 60 frames per second creates extremely smooth motion, especially useful for action footage.
Selecting correct sequence settings ensures that footage matches the project format, prevents quality loss, and improves rendering performance.
Timeline, Video Tracks, and Audio Tracks Explained
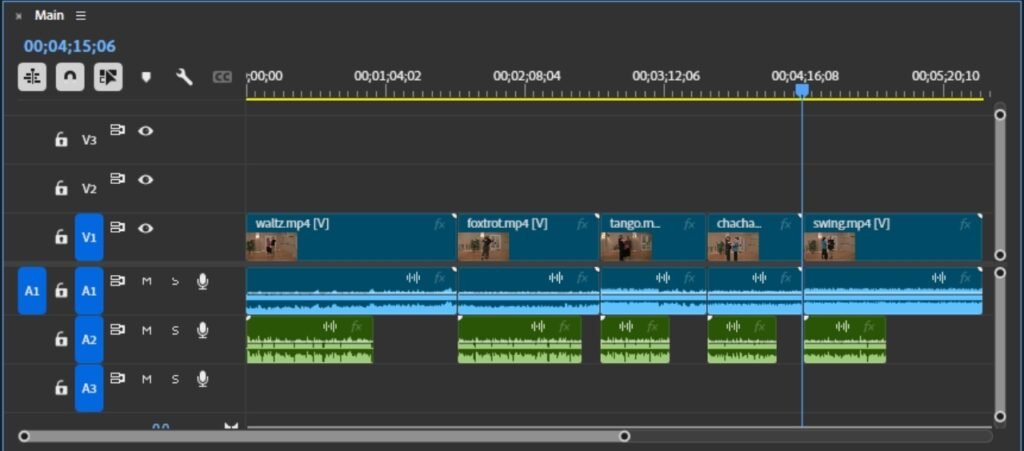
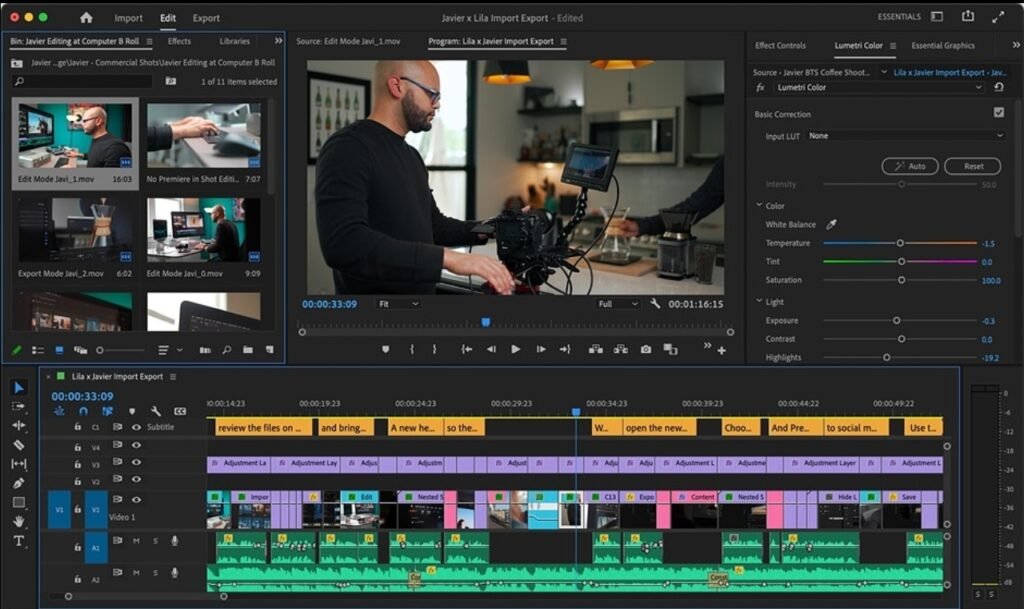
The Timeline is the central working area in Adobe Premiere Pro where video editing takes place. It allows editors to arrange clips, trim footage, add transitions, synchronize audio, and build the final video structure. The timeline operates using a track-based system that separates visual and audio elements for better control.
Video tracks are used to place video clips, images, text overlays, and graphics. Multiple video tracks can be layered on top of each other, where the upper track appears above the lower track visually. This feature allows editors to create effects such as picture-in-picture videos, titles, and overlays. Each clip in the timeline can be trimmed, split, or repositioned to create a smooth sequence.
Audio tracks handle sound elements such as background music, voice recordings, and sound effects. Premiere Pro displays audio waveforms that help editors identify sound levels and synchronize audio with video accurately.
Audio tracks also include volume adjustment, fade effects, and noise control features to improve sound quality, The timeline includes essential tools such as Razor Tool for cutting clips, Selection Tool for moving clips, and Zoom controls for adjusting timeline view. Editors can also add transitions between clips to create smooth visual flow. Proper timeline management helps create professional-quality videos with precise control over every frame.
Professional Editing Workflow and Best Practices
Professional video editing requires a structured workflow that combines all these elements effectively. Editors typically begin by creating a well-organized folder structure, followed by importing media files correctly. Next, they create a sequence with proper resolution and aspect ratio based on the final output platform. After setting up the project, editors arrange clips in the timeline, organize tracks, adjust audio levels, and apply effects where necessary.
Understanding workspaces improves efficiency by providing specialized tools for different editing tasks. Proper folder management prevents project errors and ensures smooth workflow. Correct sequence settings maintain video quality and compatibility. Effective timeline usage helps editors create engaging and visually appealing content.
Mastering these core features of Adobe Premiere Pro builds a strong foundation for advanced editing techniques such as color grading, motion graphics integration, and cinematic video production. With consistent practice and organized workflow, editors can produce high-quality professional videos suitable for digital media, marketing, filmmaking, and online content creation.