
Understanding the timeline, tools, and keyboard shortcuts in Adobe Premiere Pro is very important for anyone who wants to edit videos efficiently and professionally. The timeline is the main area where all your editing work happens, and it is the place where you arrange your videos, audio, and effects in a proper sequence. When you import your media files into the Project Panel and drag them into the timeline, they are placed in tracks.
These tracks are divided into video tracks and audio tracks. Video tracks are used to place your video clips, images, text, and graphics, while audio tracks are used for sound, music, voice recordings, and effects. You can use multiple tracks depending on your project needs. For example, you can place your main video on Video Track 1, add text or overlays on Video Track 2, and effects on higher tracks. Similarly, audio tracks can be used for background music, voiceovers, and sound effects separately, which helps in better control and editing. One important thing to understand is that higher tracks will appear above lower tracks, so layering works from bottom to top. The timeline also allows you to cut, trim, move, and adjust clips easily. You can use simple actions like dragging the edges of a clip to trim it or moving clips left and right to adjust timing.
🎬 Timeline Overview (Visual Guide)
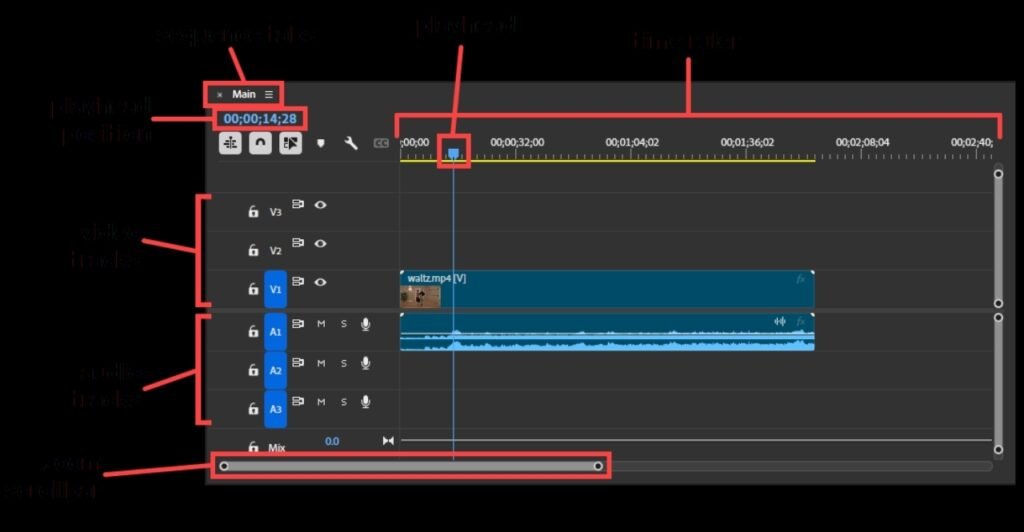
The playhead is another important element in the timeline, which shows your current position in the video. Wherever the playhead is placed, that is where your editing action will happen. Learning how to control the timeline properly will make your editing smooth and fast. Now coming to the toolbar, it contains all the essential tools required for editing. Each tool has a specific purpose and helps you perform different actions quickly. The Selection Tool is the default tool used to select and move clips in the timeline. The Razor Tool is used to cut clips into parts, which is very useful for removing unwanted sections. The Ripple Edit Tool allows you to trim clips and automatically adjust the rest of the timeline without leaving gaps. The Rolling Edit Tool is used to adjust the cut between two clips without changing the overall duration. The Slip Tool lets you change the content inside a clip without moving its position in the timeline, while the Slide Tool moves a clip left or right while adjusting surrounding clips.
🛠️ Toolbar Tools
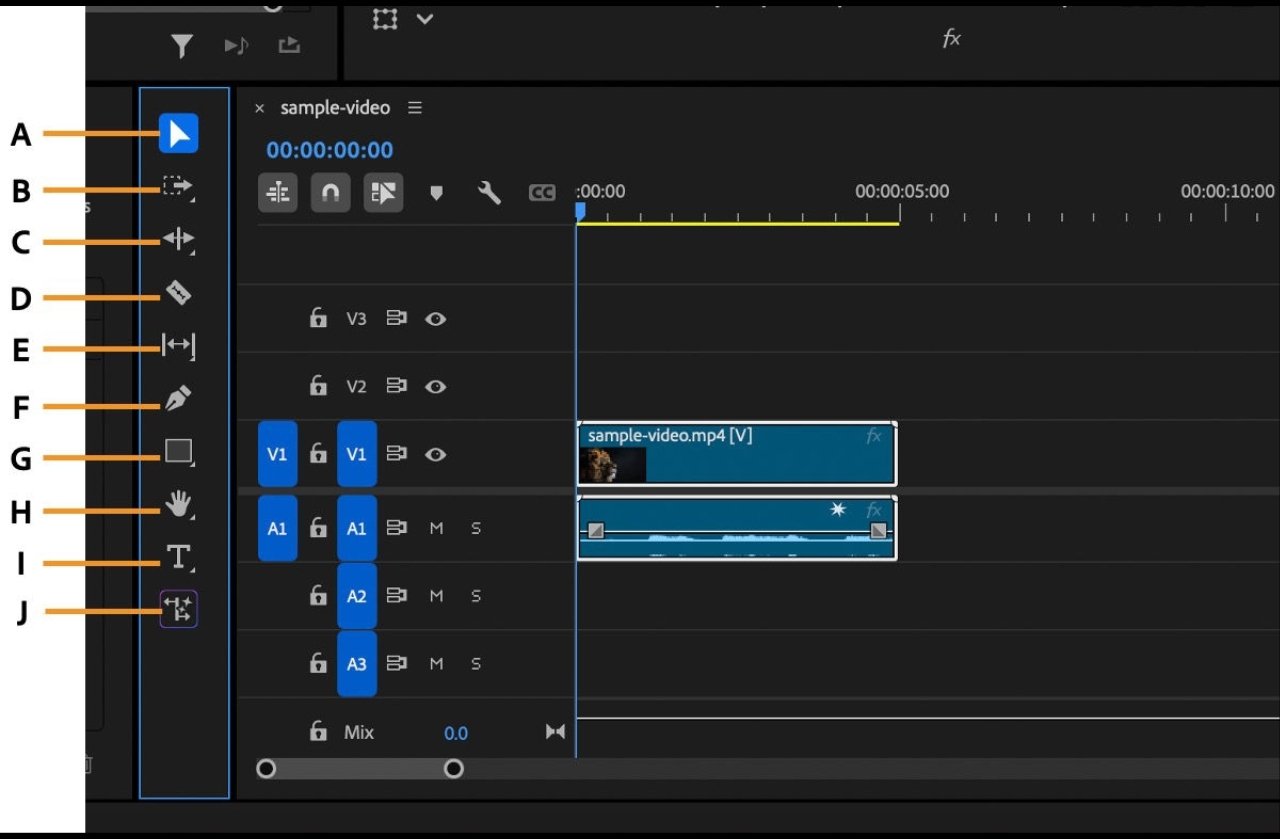
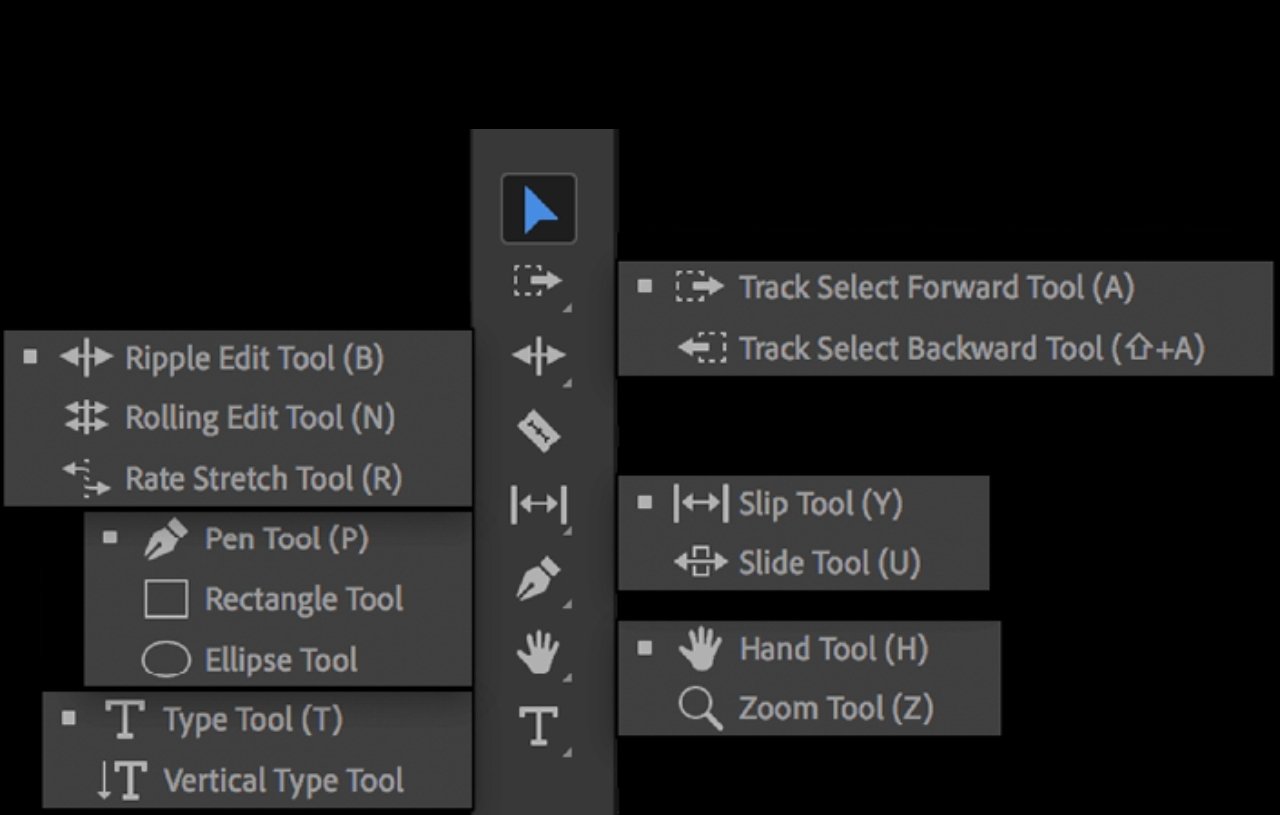
The Pen Tool is used for creating keyframes and adjusting effects like opacity and audio levels. The Type Tool helps you add text directly into your video, which is useful for titles and captions. Each tool may look confusing at first, but once you practice using them, they become very easy and save a lot of time. Instead of using tools manually every time, professional editors rely on keyboard shortcuts to work faster. Keyboard shortcuts are one of the best ways to speed up your editing process and improve productivity. Premiere Pro allows you to customize keyboard shortcuts according to your comfort. You can go to the keyboard shortcuts settings and assign your own keys for different actions. For example, instead of manually selecting the Razor Tool, you can press a single key to cut clips instantly. Common shortcuts like Spacebar for play and pause, Ctrl + Z for undo, and C for cut are very helpful in daily editing.
⌨️ Keyboard Shortcuts Settings
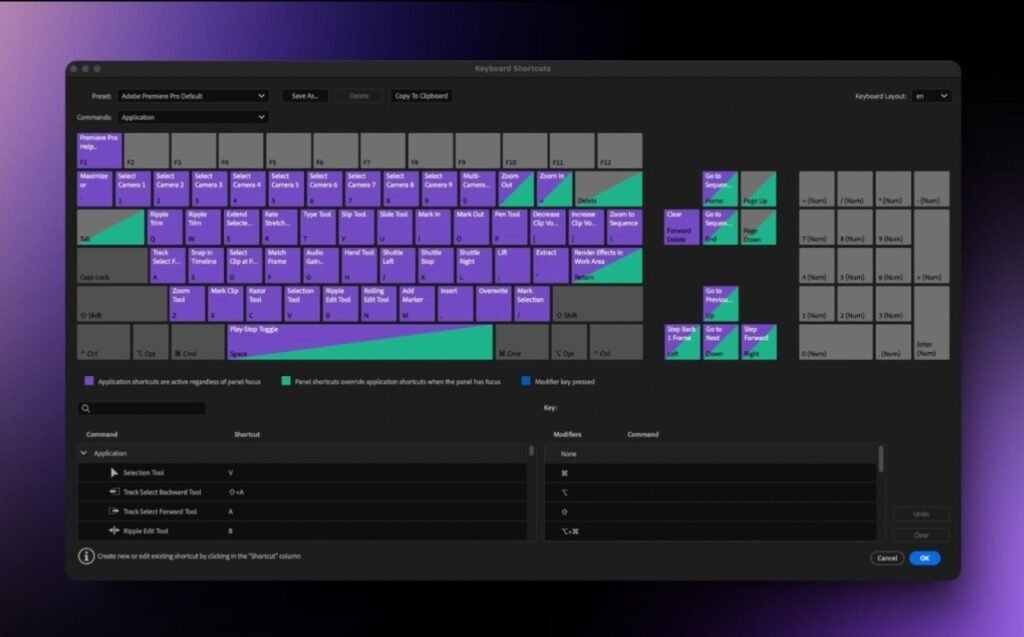
By using shortcuts regularly, you can edit videos much faster compared to using only the mouse. Customizing shortcuts based on your workflow can make editing even more efficient. For beginners, it is recommended to start with basic shortcuts and gradually learn advanced ones. This will help you build speed and confidence over time. Another important tip is to keep your timeline clean and organized. Use proper track names, remove unwanted clips, and keep your workspace simple.
This helps you avoid confusion, especially when working on large projects. Also, try to zoom in and out of the timeline to get better control while editing small details. The timeline, tools, and shortcuts together form the core of video editing in Premiere Pro. If you understand these three things clearly, you can edit videos faster and more professionally. Beginners may feel overwhelmed in the beginning, but consistent practice will make everything easier.
Focus on learning step by step, and do not rush into advanced features without understanding the basics. Once you are comfortable with the timeline and tools, you can start exploring effects, transitions, and color grading. Premiere Pro is a powerful software, and mastering these core features will give you a strong foundation in video editing. Over time, you will develop your own editing style and workflow, which will help you create high-quality videos In the next articles, you can learn more advanced techniques and improve your skills further.