
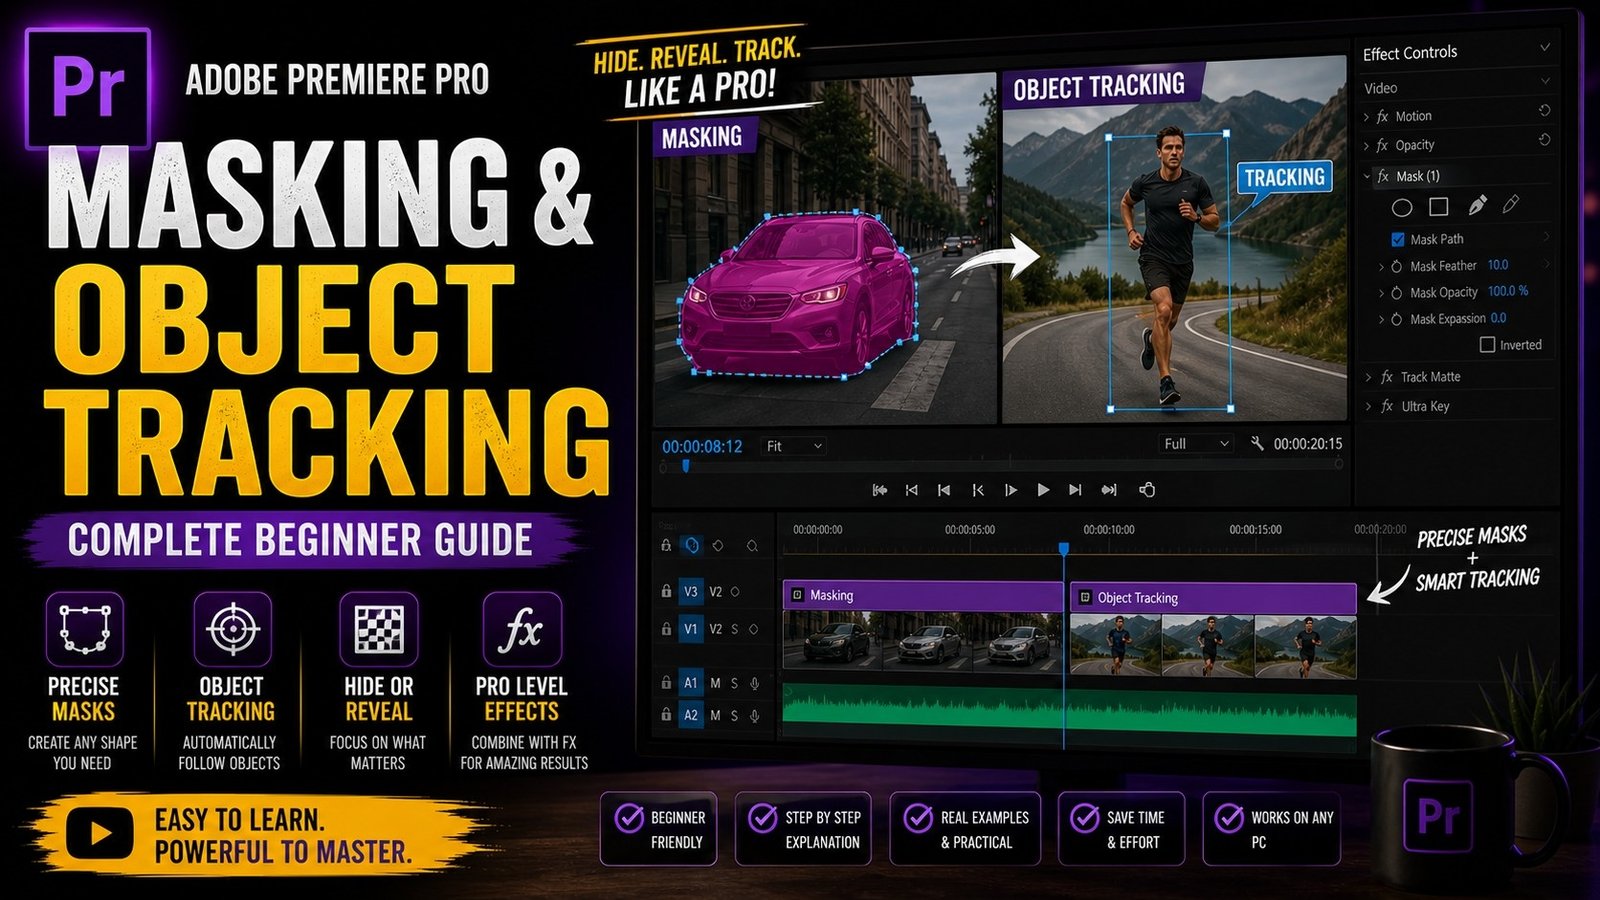
Masking and object tracking in Adobe Premiere Pro are powerful features that allow you to control specific parts of your video instead of applying effects to the entire frame, which helps you create more professional and visually interesting edits even as a beginner. Many creators use masking for effects like blurring faces, highlighting subjects, color corrections in specific areas, or creating cinematic focus effects. To start with masking, you first need to import your clip into Premiere Pro and place it on the timeline. Select the clip and go to the Effect Controls panel, where you will find mask tools such as ellipse, rectangle, and pen tool under different effects like opacity or blur.
The easiest way to understand masking is to apply an effect first, such as Gaussian Blur, and then create a mask around the object you want to blur. Once you select the mask tool and draw around your subject, only that selected area will be affected by the effect. This is very useful for privacy purposes like blurring faces or number plates. However, if your subject is moving, the mask will not automatically follow it unless you use tracking. That is where object tracking comes into play.
Premiere Pro provides a built-in tracking feature that allows your mask to follow the movement of the subject throughout the video. After creating the mask, you will see tracking buttons like “Track Forward” or “Track Backward” in the Effect Controls panel. When you click Track Forward, Premiere Pro analyzes the movement frame by frame and adjusts the mask position accordingly. This saves a lot of time compared to manually adjusting the mask for every frame.
🎬 Mask Creation Example

After applying tracking, it is important to refine your mask for better results. You can adjust parameters like feather, expansion, and opacity. Feather controls how soft the edges of the mask are, which helps in blending the effect naturally with the rest of the video. Expansion allows you to increase or decrease the mask size without redrawing it. These small adjustments make a big difference in achieving a professional look.
Beginners often ignore these settings, which results in harsh edges that look unnatural. Another important use of masking is color correction. Instead of adjusting colors for the entire video, you can apply Lumetri Color and then create a mask to adjust only a specific area. For example, you can brighten a face while keeping the background unchanged. This technique is widely used in professional editing to maintain focus on the subject. Masking can also be used for creative effects like spotlight effect, where you darken the background and highlight the subject using a mask.
🎯 Object Tracking Process

Another advanced but useful application of masking is creating transitions. You can use masks to reveal or hide parts of a video, creating smooth and unique transitions. For example, you can mask a moving object and use it as a transition element between two clips. This adds creativity and uniqueness to your edits. Masking combined with keyframes can also create motion effects. By animating the mask position, you can make the effect move across the screen, which is useful for text reveals or highlight effects. Understanding how keyframes work with masks will give you more control and flexibility in editing.
🎨 Before & After Masking Effect

For best results, always start with clean footage. Good lighting and clear subject separation make masking much easier and more accurate. Avoid using low-quality clips with too much noise, as tracking may not work properly. Practice is very important when learning masking and tracking. Try different clips and experiment with various effects to understand how masking behaves in different situations.
Even if your system is not very powerful, you can still learn masking by working with smaller clips or lower resolution previews. Premiere Pro provides all the necessary tools to perform masking and tracking effectively, and mastering these features can significantly improve your editing skills. These techniques are widely used in YouTube videos, films, and professional projects, making them essential for anyone who wants to become a skilled video editor. Over time, as you gain experience, you will be able to use masking creatively and efficiently to produce high-quality videos that stand out.